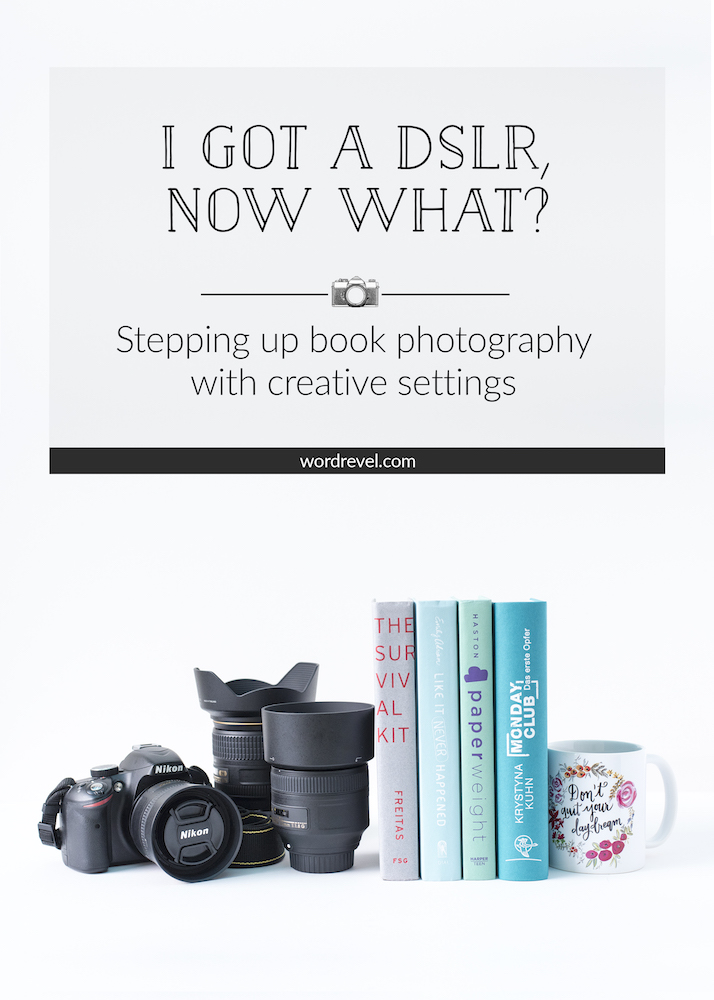
So, you acquired a DSLR in the hopes of taking better photos or you plan to in the near future. To fully maximise the potential of that snazzy new camera, you want to know how to use it. That means learning the basic functions and how to control the exposure. Photography is about capturing your subjects as well as the light in the best possible way. To help you with that, here’s a primer on stepping up book photography with a DSLR.
Exposure
There are three inter-related settings that determine the exposure. Changing one setting means another needs to be changed as well to balance. If only one setting is changed, then the exposure will either be higher or lower, depending on how the setting is changed. These settings are known as aperture, shutter speed and ISO. Mastering these will allow you to control the outcome of your photos.
Aperture
Aperture refers to the lens opening. The wider it is, the more light is allowed into the lens. Conversely, the narrower the lens opening, the less light will enter the camera. In the case of book photography, I’d say this usually is the primary consideration when taking photos. That is because aperture is what controls the depth of field.
Measured in f-stop, aperture is denoted by f/1.8, f/5.6, f/16, etc. Now, what do these numbers behind the f mean? Lower numbers indicate wider apertures. As the numbers increase, the aperture narrows. Higher f-stops, like f/12 or f/18 result in sharp focus across the photo. Your subject as well as the background will be sharp without any blurring. Smaller f-stops like f/2.8 or f/1.4 result in backgrounds that are out of focus while the subject remains sharp.
Shutter Speed
Shutter speed is important when you’re trying to capture moving subjects. The faster the shutter speed, the more their motion will be frozen. This is crucial particularly in sports photography. A shutter speed of 1/4000 second or even 1/8000 second ensures that an athlete is frozen in the moment. If a shutter speed is slower at 1/500 or so, then the movement will cause an athlete to look blur in the photos.
In the case of book photography, and product photography in general, shutter speed doesn’t need to be that fast. Books after all, don’t move. However, you don’t want it to be too slow either. At 1/40 second and slower, you’ll likely cause camera shake. If there’s no way around that to gain the proper exposure, a tripod is necessary. Mounting a camera on a tripod means no matter how slow the shutter speed, the photo will still come out tack sharp.
The baseline to avoid camera shake depends on your lens. The heavier the lens, the more difficult it will be to keep it steady with your hands. Also, the longer the focal length, the quicker it will pick up on camera shake. Find that point for your lens and keep your shutter speed faster than that whenever taking handheld photos.
ISO Sensitivity
ISO is kind of a holdover from film photography. For those of you who used to shoot with film cameras or who still do on occasion, you know that film comes in various ISO grades: 100, 200, 400, 800, and so on. 100 is ideal for bright sunny outdoors while 800 is preferred for indoors. However, if it gets too dark, the photos tend to turn out grainy.
For digital photography, ISO sensitivity refers to the light sensitivity of the sensor. Usually it’s best to keep the ISO as low as possible. The higher the ISO, the less detail a sensor can record. That’s why trying to push the ISO of a DSLR up to 3200, 6400 or even higher results in photos that contain a lot of noise.
That being said, don’t underexpose a photo just so that you can set the ISO low. Correcting that in Photoshop later will result in grainier photos than choosing the correct but higher ISO in the first place.
Creative Settings
Theoretical knowledge is all well good. The question is, how do these settings apply to the actual photo taking? Well, the most straightforward options on the mode dial are camera presets. They’re denoted by the little icons such as mountains for landscapes, utensils for food and a figure for portraits. These should be familiar to anyone who has ever used a point-and-shoot digital camera.
There also are letter markings on the mode dial: M, A or Av, S or Tv and P. These are also known as the creative settings. M stands for manual mode, A for aperture priority or Av for aperture value, S for shutter speed or Tv for time value, and P for program mode. Regardless of the mode you use, you have to pick your preferred ISO.
Manual Mode
Choosing manual mode means being 100% in control. Besides the ISO, you fix the aperture as well as the shutter speed.
Aperture Priority
In aperture priority mode, you pick the aperture while the camera automatically sets the shutter speed. The shutter speed is based on the exposure calculated by your camera.
Shutter Priority
In shutter priority, you pick the shutter speed while the camera sets the aperture. This too the camera calculates based on the ideal exposure from its inbuilt meter reading.
Program Mode
This ones an odd mode that allows photographers to pick one of a few suggested aperture and shutter speed combinations. I have no idea why that would ever be useful because to me that’s just an advanced automatic option.
Suggested Settings
When I’m out on the go, I prefer shooting in manual mode. Usually I have enough time to think about the specific result that I want to achieve with my photos. When I’m out at night though, I usually pick aperture priority and set it to the lowest possible f-stop of my lens while keeping my ISO in the range of 800 to 1600.
In the case of book photography, I used to shoot in manual mode, so that I could better learn how each setting would affect the outcomes. After internalising all these settings I’ve come to prefer aperture priority. Since I generally mount my DSLR on a tripod, shutter speed rarely is a concern. When I do take handheld photos, I ensure the shutter speed is acceptable. If not, I bump up the ISO to compensate for the proper exposure.
Some Examples
Below are some photos I’ve taken. In the caption you’ll see the exposure settings. For each photo I’ve added a note as to why I chose these particular settings.
[ezcol_1half]
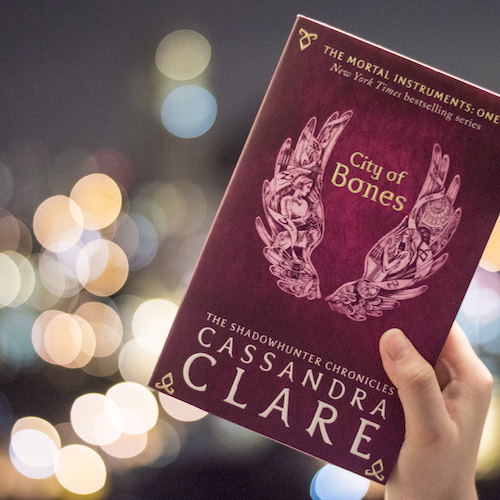
ISO 800, f/1.8, 1/8s
[/ezcol_1half]
[ezcol_1half_end]

ISO 800, f/3.5, 1/500s
[/ezcol_1half_end]
Left: Using f-stop 1.8 allowed me to achieve bokeh lights. The depth of field was so shallow, the focus was kept on the book while everything else in the background was completely out of focus. Even though my camera was mounted on a tripod, the book and hand were a slight bit blurred. The reason was the slow shutter speed. At 1/8 second my camera detected the slight movement from my hand holding up the book.
Right: Here I made sure to use a faster shutter speed. With 1/500 second shutter speed I was able to freeze the flame. At the same time, I went with f/3.5 to ensure all objects were in focus.
[ezcol_1half]
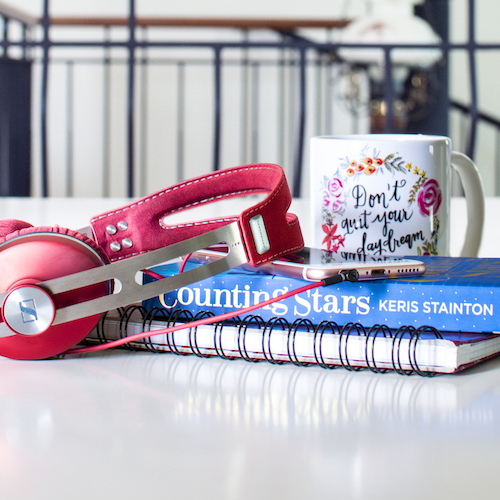
ISO 400, f/6.3, 1/30s
[/ezcol_1half]
[ezcol_1half_end]
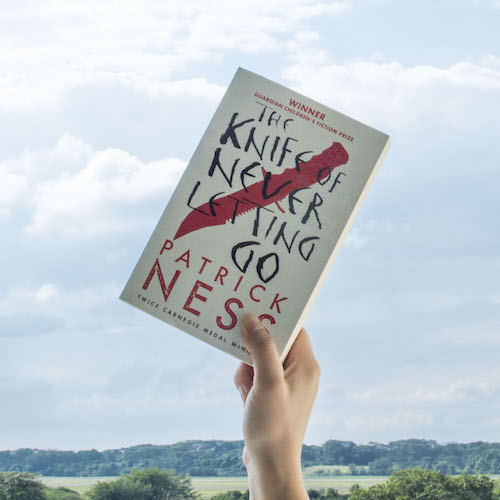
ISO 200, f/22.0, 1/200s
[/ezcol_1half_end]
Left: To keep the mug behind the book just about in focus, I had to stop down the aperture.Using f/6.3 I was able to keep the objects in the foreground in focus while blurring the background a little. Had I kept everything in focus, the strong lines of the railing would have distracted from the foreground.
Right: Using a very high aperture, I was able to to include sharp details of the book as well as the field and sky. The clouds are clearly distinguishable, as are the trees.
[ezcol_1half]
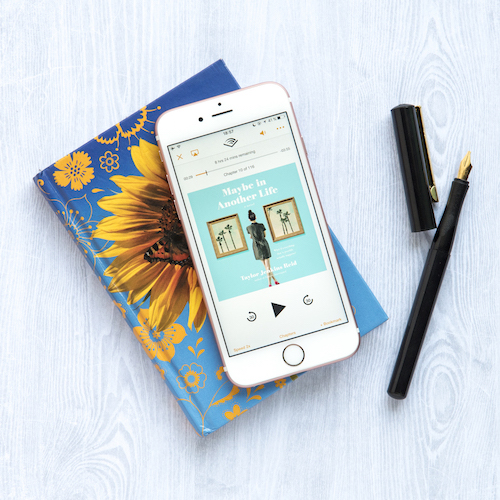
ISO 400, f/6.3, 1/40s
[/ezcol_1half]
[ezcol_1half_end]
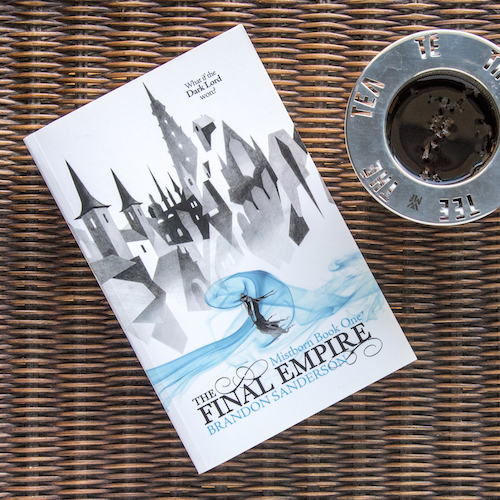
ISO 640, f/8.3, 1/20s
[/ezcol_1half_end]
Left: Even though f/3.5 would have sufficed for the phone and notebook, I went up to f/6.3. This was to ensure sharpness of the grain in the background as well.
Right: The mug with the sieve and tea leaves was much taller than the book. To ensure that everything from the top right to the woven base was in focus, I had to use a narrower aperture. f/8.3 did the trick for me.
[ezcol_1half]
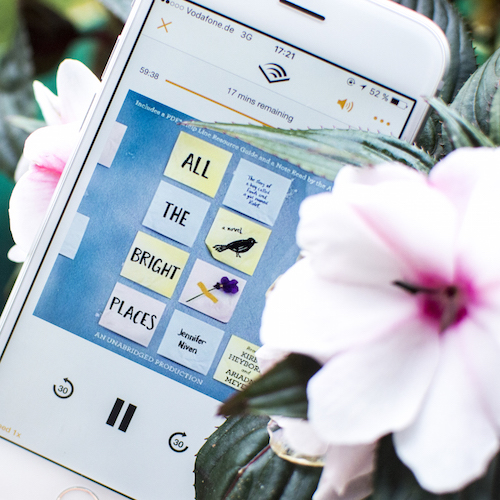
ISO 800, f/3.5, 1/320s
[/ezcol_1half]
[ezcol_1half_end]
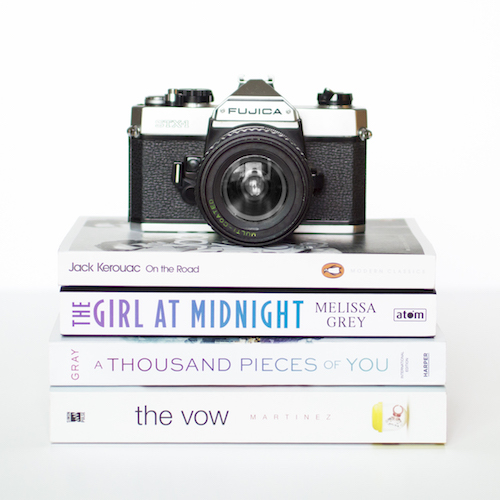
ISO 200, f/1.8, 1/200s
[/ezcol_1half_end]
Left: The flowers in front and at the back are out of focus. That is because I kept a relatively wide aperture of f/3.5. I focused on the screen of my phone, so that things nearer to the lens and further away would be blurred.
Right: Lastly, when using plain white backgrounds to make books stand out, I use f/1.8 for my aperture setting. This way the separating line between the table and the wall becomes almost indistinguishable and the background looks uniformly white.

Thank you so much for this Josephine! I have a DSLR for years now and I still have no idea what I’m doing or what everything means. Thank you for showing us examples and how you achieved that picture. It helps knowing how you change one little setting, what would happen. All your photos are superb <3
Thank you, Giselle! <3 I'm sure with more determined practice you'll figure things out. You could try to replicate some of my photos to get the hang of things and to better understand the settings :)
I have a DSLR, but I have never gotten all that good at using it. I appreciate this practical advice!
AHHHH this post is so helpful. Or, I mean, it would be if I had a DSLR. So for now I’ll plod along using my iPhone and crying because I just want to be able to play around with aperture/shutter speed. I mean, you can change focus to SOME extent on the iPhone but it’s nothing on a proper camera.
Still…bookmarking in case one day I do get one :)
Josephine, this is great! I always keep forgetting what the numbers for the f settings mean, and I’ll definitely have to spend a day playing with the camera with this post up to refer to!
YAAAASSSSSSS thank you for writing this post for me! I’m always curious about using my DSLR for book photography. So far I’ve played around a lot with the Aperture settings, but I still have no idea about the shutter speed and finding a default one. That’s why I can’t use full manual mode yet (i also need to get myself a tripod).
The other day I was filming a booktube video and couldn’t get my head around the settings in the DSLR and getting blurring the background but I think that’s because of my lens.
Thanks for the awesome helpful guide once again!
Awesome post!
I bought a DSLR about a year ago and was all geared up to get really good at photography and make my blog photos better, but seen as I could never really grasp the settings I kind of lost heart with it. This post has been a massive help though, especially seen as you show examples of the difference all the settings can make, so I’ll definitely be giving it another go! :)
Oh my gosh, thank you so much for this post!
I don’t have a DSLR, nor plan to get one, but I love how you discussed some general photography stuffs here <3
I've always wondered what ISO was, for example, but never really got a clear answer until now!
Thanks so much, Josephine, awesome post as always! :D
I love having examples so I can see the difference and your explanations about why you used certain settings is REALLY helpful. Thank you so much. I”m planning to play around with my camera tomorrow and I will use your photographs as guidelines :)