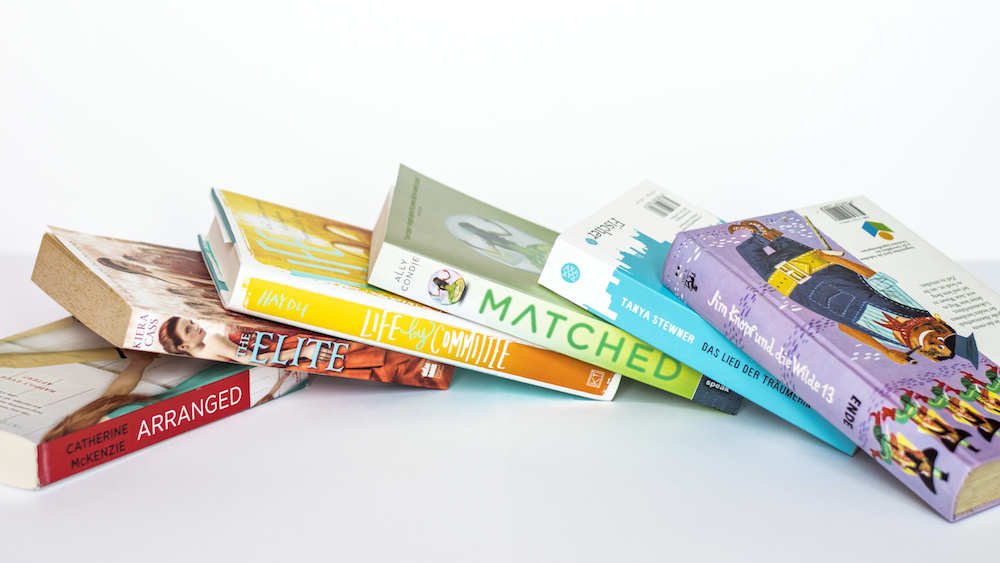
Every now and then I receive comments on Instagram about how someone loves the brightness of my photos. Some even ask me what filters I use to achieve that kind of brightness. I rarely ever use filters. If I do, it’s to achieve a particular mood but that doesn’t really apply to book photography.
As much as possible, I try to set up my frames such that they require as little editing as possible. Sometimes I still have trouble getting the right exposure, especially if the light keeps changing. When that happens, I at least aim to hit a reasonable range, then increase or decrease it accordingly when I post-process my photos since I shoot in RAW.
How to Achieve Bright Photos
Anyway, the point of this post is, how can you achieve bright photos? The answer is fairly simple. Take photos near a bright light source and bounce the light. What does bounce the light mean? It basically means that you use a neutral surface on the side on which the light casts a shadow to fill the darker spots with reflected light. (For a more in-depth look at the set-up, you can refer to Georgie’s post.)
The Set-Up
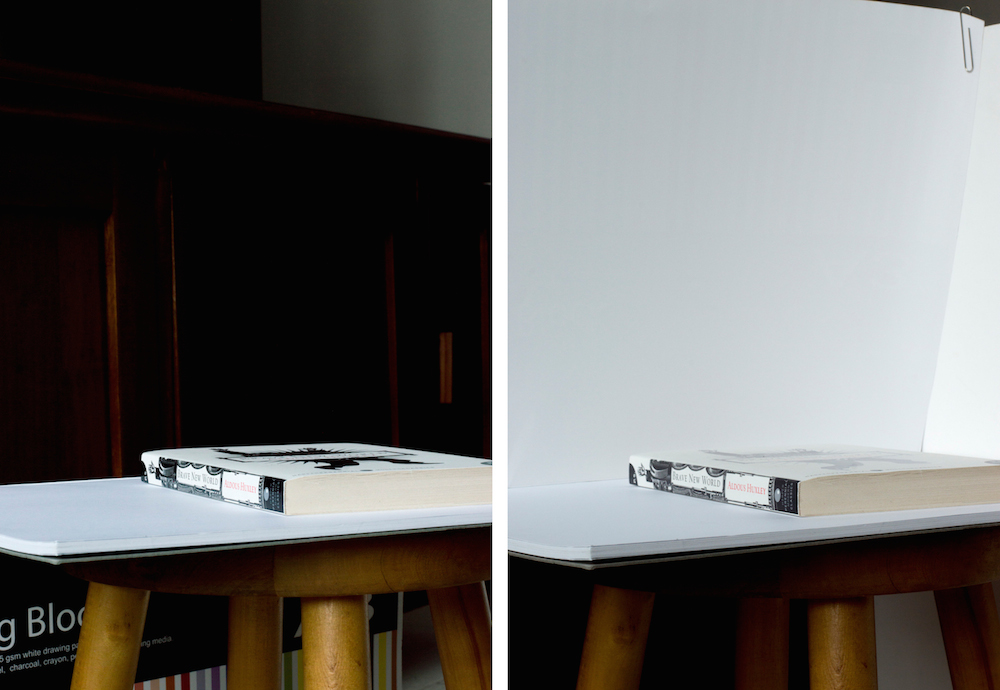
On the left, I placed the book on a white background and left it at that. On the right, you can see that I propped up white boards to form a wall off which the light from the window could bounce. It’s a make-shift set-up that anyone can emulate. My approach is so low-tech, I used a paper clip to secure the upper corner.
Comparison
If all you want to do is take a quick snapshot of your book and get on with actually reading it, you might wonder if this extra effort is worth it. I decided to let photos speak for themselves.
I took photos of the same book with and without bouncing light. The camera settings were the same and I took them in quick succession, so that the lighting condition would be identical. I also post-processed the photos with the identical settings, so that the difference would be evident.
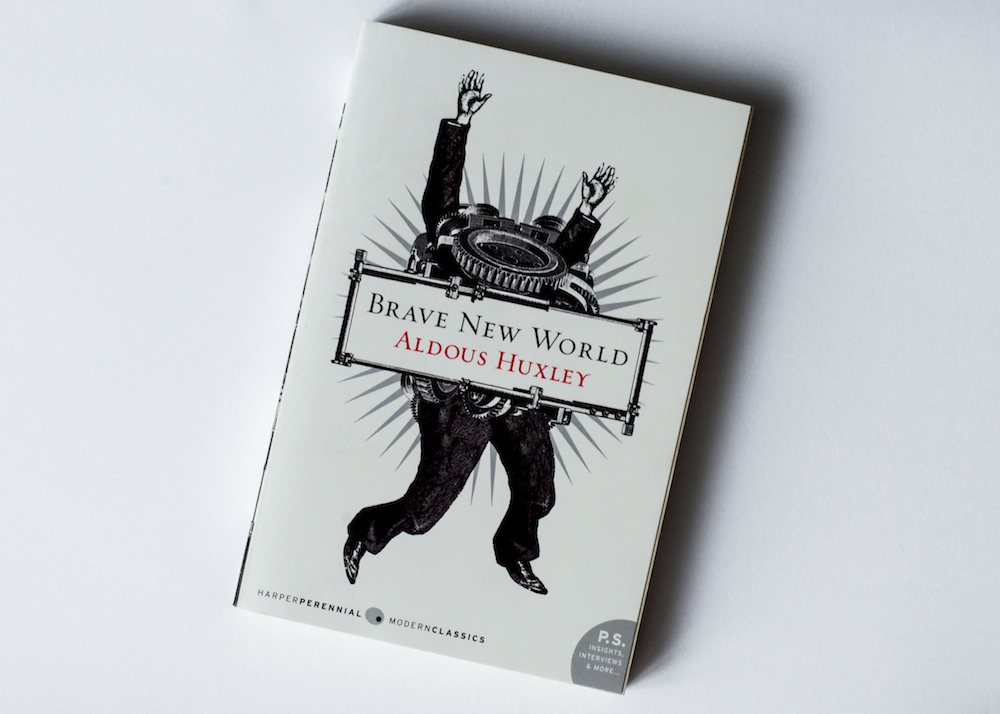
This is the result without bounced light
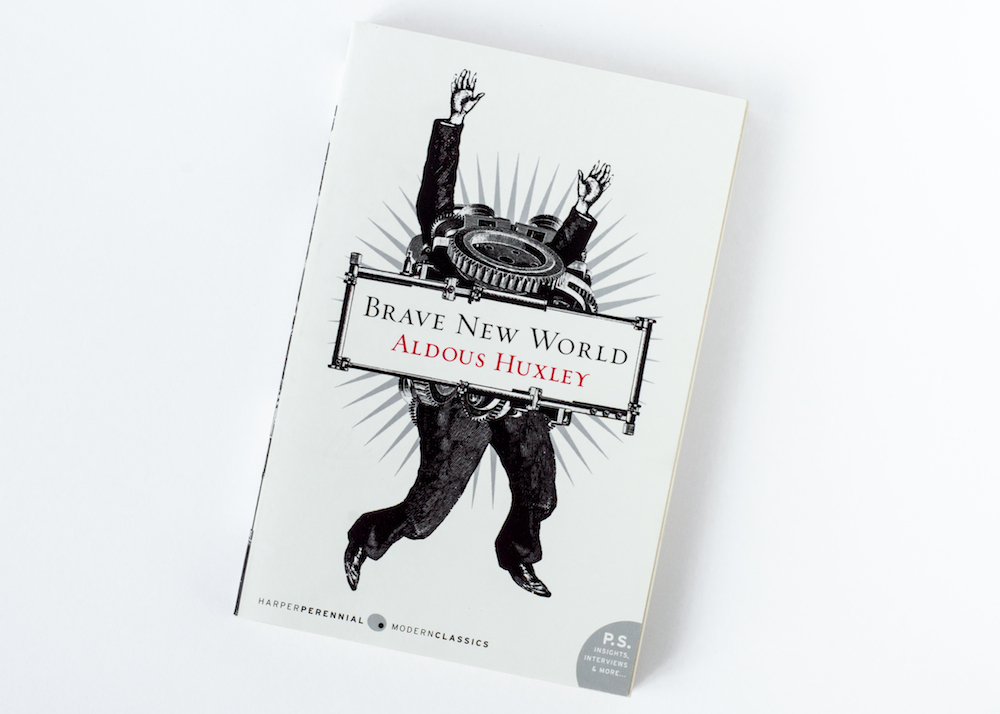
This is the result with bounced light
Conclusion
The photo where I made the extra effort to bounce the light came out a lot brighter and the shadow of the book is very soft. Without the set-up, the photo came out darker and the shadow is a lot more pronounced.
In the second photo, I could liberally increase the contrast between the white and the black on the book cover. In the first photo, I couldn’t bring out the contrast without defining the shadow that the book cast on the white background.
Since I love bright colours that pop and tend to amp up the contrast between white and black for greater definition, I think it’s well worth spending an extra minute to set up. No amount of post-processing or application of filters will bear quite the same level of brightness.

Ok seriously, I need to buy some white boards! Thanks so much for these tips!
Have fun experimenting! And I’m glad those tips were useful for you :)
This is exactly what I have been looking for! I bought a couple of cheap foam boards to use for my photos but I didn’t really know how to set them up to get the bright effect I love! Thanks.
I’m glad this helps!
This is amazing! The comparison photos really showcase how big of a difference the light bouncing makes! I am just starting to get into photography (well I want to… but I’m not great haha) as my BF bought me a beautiful Rebel, but I find myself using it mostly like a point and shoot. I’ve bought a few books to help me, but your tips the last couple of weeks are much more user friendly and pertinent to my life (cough.. books!). Thanks so much :)
True that. The difference is mind boggling. I knew the theory behind it but didn’t know how legit it was. Now with the comparison photos, I finally have my own evidence. Hahaha. Yay to book photography! :D And well, I learnt a lot from reading books on photography as well. And YouTube videos. Watching photography tutorials on YouTube is a major time warp for me. Heh.
I LOVE this post!! My book photography is a very in the moment thing- sometimes it works and sometimes it doesn’t, haha! After reading this I think I’m going to try and make my photos a bit better! :D
Rita xx
You can start by experimenting. Try different versions of the same photo — different angle, change the direction of the light source, photograph close-up and further away, etc. This will give you better sense over time of what works and what doesn’t :)
I love your photos! I agree that the lighting really helps. Bouncing light is a very clever idea. I’m personally not much of a photographer, but it is something that I would like to start experimenting with in the future. Lovely post!
Thank you, Samantha :) Well, simple things like these already make a significant improvement to photos, even if you’re not all that into photography.
Thanks for the insight, very informative as usual :D I started experimenting with my own white boards and it’s a lot of fun to see what difference they can make.
I’m curious what kind of editing you do on your photos, what programs and settings you use, and before and after shots of course :)
I acquired foam boards this week, which are significantly bigger than drawing blocks, so I’ve been excitedly bouncing all the light I can ;D
Thank you for your input. I’ll keep it in mind for future posts!