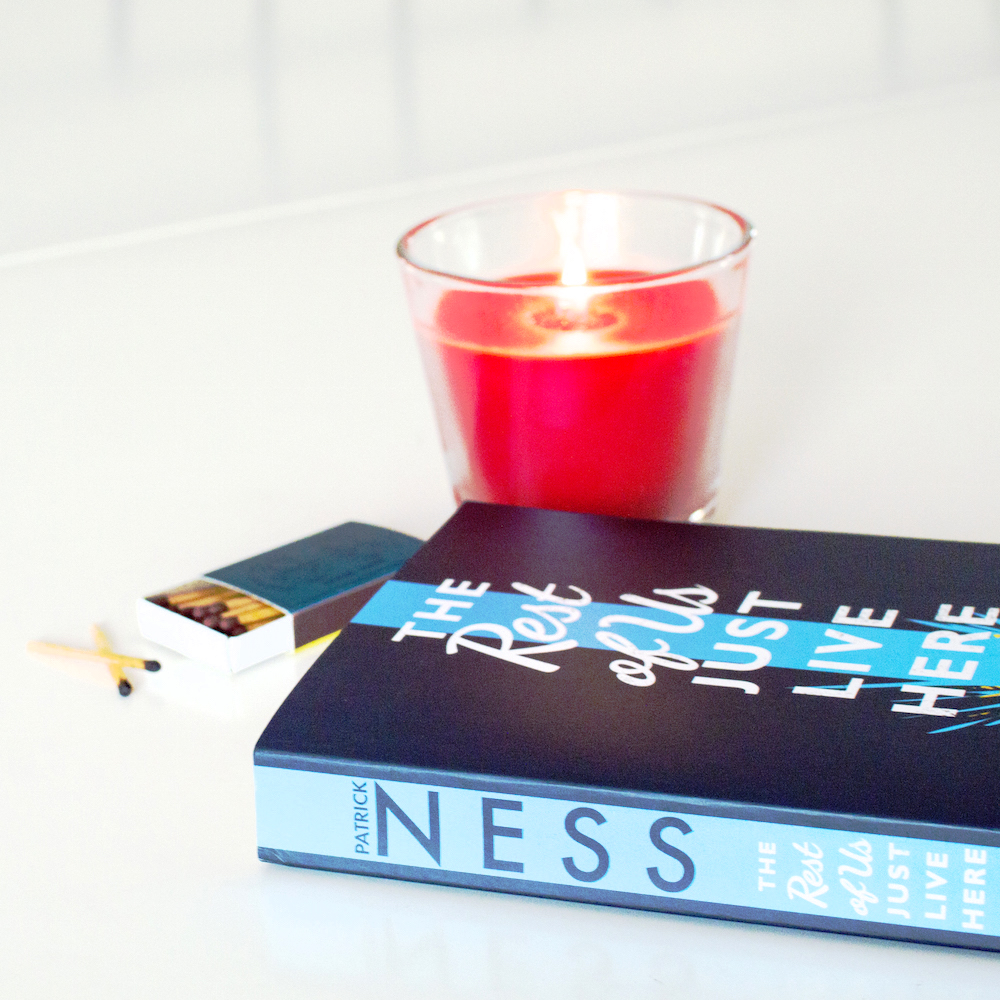

Sometimes the light conditions aren’t ideal when we do have time to take our bookstagram photos. In this case, I took the photo on an overcast day, so the light in my study wasn’t even. This can be seen by the overexposed book spine which was directly facing my window. This problem can be fixed in Photoshop with the burn tool.
Step 1: Duplicate photo layer and select area to edit
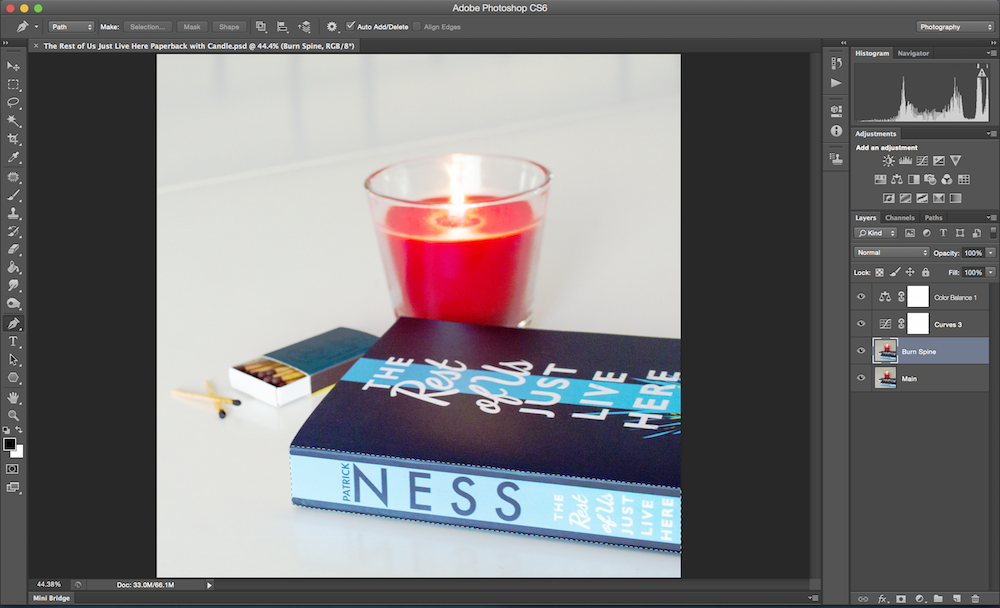
Dodging and burning are actions that directly alter the pixels of an image. This means that the original image cannot be recovered. That’s why it’s good practice to duplicate layers and work on the copy. I named my copy layer “Burn Spine” and left the “Main” layer untouched. Select the area to edit in the duplicate layer.
Side note: I also adjusted my curves and colour balance already, leaving the book spine correction last. That way evening out the light will yield the best possible result.
Step 2: Pick the burn tool

Pick the burn tool. You’ll find this in the side pane under the pin, hand or sponge symbols. Set the range to midtones. Burning will darken the exposure of specific areas that you apply it to.
Step 3: Burn selected area

When burning the selected area, I like to use a brush size bigger than the selected area. This will tone down the exposure across the board. Then I reduce the size and clean up smaller patches within the selected area.
Step 4: Reduce harshness of dividing line
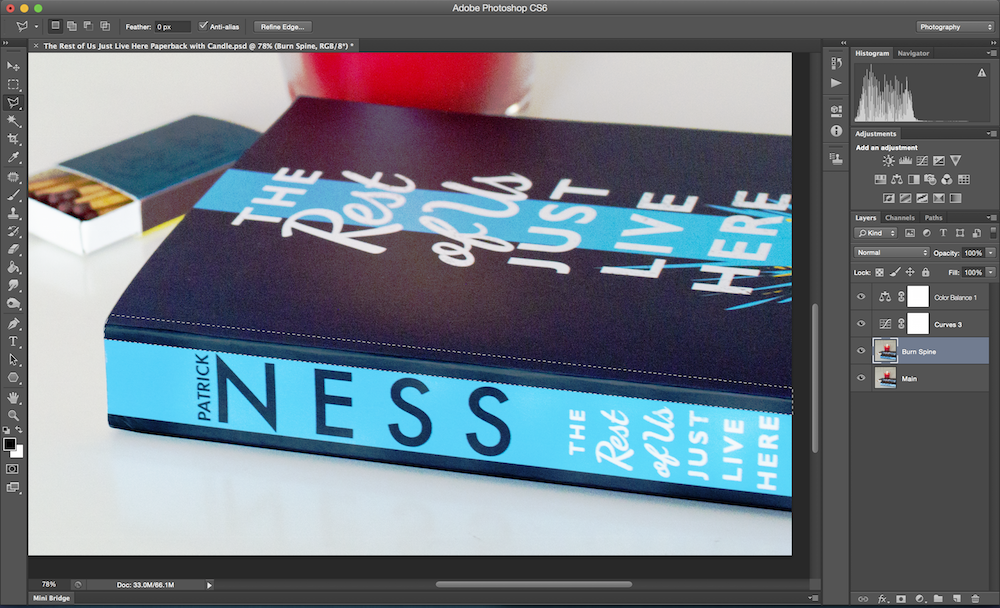
The thing about burning a selected area usually is that there will be a harsh line between the edited area and the rest of the image. One way to overcome this is to go in free hand and not pre-select the area. Then there won’t be such a starkly visible divide. The alternative is to dodge and burn along the line. Here I burned the edge with a small brush size.
Step 5: Clean up

The last step is to zoom in and clean up. I often find myself zooming in to 400% which isn’t quite so big for pixel-by-pixel edits but large enough that if an image looks cleaned up at that size, there won’t be any visible problems at 100% anymore.

Great tip, thanks for sharing. :)
By the way, I think you have the “before” and “after” reversed on your image at the top. It threw me for a minute. :)
Thank you for pointing that out, Ashley! I corrected it :)
Thanks for this tip! I usually just change the levels of the image in photoshop, but using the burn tool could also really help change the lighting. Your pictures are awesome!
Thank you, Stephanie! :) Most of them time I also just work with levels and curves. Once in a while though when time and daylight aren’t on my side I’m really glad that I can clean up those problem areas.
The burn and dodge tools are absolute life-savers! I barely use them for my Bookstagram photos, but I use them a lot for photos for my school newspaper. I typically pull out the graduated filters for Bookstagram and personal photography because I prefer to shoot in RAW and edit in Adobe RAW before transferring to Photoshop or Lightroom.
I try to make use of various tools even for bookstagram because it’s a good avenue to practice :) But yes, dodge and burn tools are essentials when it comes to photography!